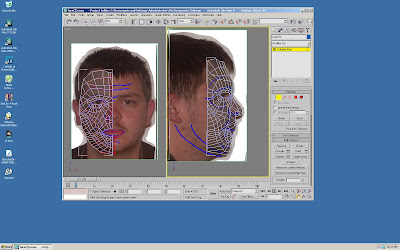
Firstly, I started by drawing over each quadrant using the line tool, which is found in the shape section of the programme.
The lines remain straight so it was important that I uncheck the beizier option and also made sure that I toggled the snap to grid option.
Once I had done this, using the pen tool I sketched over each and every quadrant making sure to match them as closely as possible where it was not possible I made sure that it was within pixels of where it should have been.
After this I then chose one top quadrant, which I then turned into a polygon that created a single shape - It was now important to create all the other shapes, and to do this I clicked on the shape that I just created, and then on the right-hand side, underneath editable polygon, I chose the weld tool. This attached all the other quadrants.
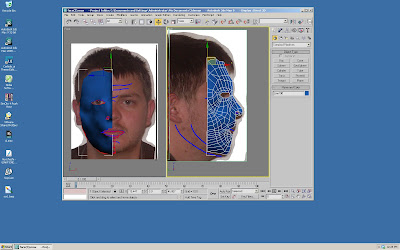
The next stage, was to extrude quadrants on the profile side, giving the face depth of structure .
To do this I had to select all of the lines which ended at the edge of the face. However my first attempt at doing this was not a successful, one and none of the quadrants extruded correctly. This left me with a very messy outline shape which could not be fixed. Therefore I had to go back and repeat the stage where I drew all the quadrants onto my face.
The second time around this was successful and following the tutorial, I continued to drag out the lines, ensuring to make space for the eyes and nose and mouth. Eventually I was left with a grid which was similar to my first grid.
The results can be seen below and as you can see, unfortunately the nose has not come across as well as it should.
What you can notice about the nose is that whilst it is visibly there it isn't very accurate. this is my first major problem with the face, and whilst I am aware that I could return to the beginning stages and correct this I do not have enough time to be able to do this.
Therefore I will continue to work around this problem, as much as I can. Hopefully the final model will not show the problem with the nose as much. It is a shame that I have to leave it like this, but some nose, is better than no nose.
The screenshots from my work are shown below:


No comments:
Post a Comment